Tuesday, July 28, 2020

Visual Studio Not open in Ubuntu 20.04


Ubuntu 20.04 /var/lib/snapd has 'other' write 40777

Happened to me also. I changed the permissions of /var/lib/snapd from 777 to 755, so just do:

sudo chmod -R 0755 /var/lib/snapd


Also Provide

GST billing software

Stock Management software

Mobile application development

Payment Gateway Integration(core PHP, Laravel and Python)


Sunday, July 26, 2020

Configure Virtual Host apache2 In Ubuntu 20.04

Configure Virtual Host  apache2 In Ubuntu 20.04


Configure Virtual Host  apache2 In Ubuntu 20.04


Do after successfull installation of LAMP

Step 1: Create web diretory of each virtual host

sudo mkdir -p /var/www/primeprogrammer.com/


Step 2: Change ownership from root to current user

$ sudo chown -R $USER:$USER /var/www/primeprogrammer.com/

Step 3: Set read permission to the Apache root directory i.e /var/www/  using command in terminal

$ sudo chmod -R 755 /var/www/

Step 4: Create demo page for host

$ sudo vi /var/www/primeprogrammer.com/index.html

<html>
 <head>
 <title>www.primeprogrammer.com</title>
 </head>
 <body>
 <h1>Hello, This is a test page for primeprogrammer.com website</h1>
 </body>
</html>

Save & Close file.

Step 5:  Create configuration file for your host (primeprogrammer.com)

$ sudo cp /etc/apache2/sites-available/000-default.conf /etc/apache2/sites-available/primeprogrammer.com.conf

Becareful that you must save all configuration files with .conf extension at the end, otherwise it will not work.

Now update in changes in *.conf file

<VirtualHost *:80>
 # The ServerName directive sets the request scheme, hostname and port that
 # the server uses to identify itself. This is used when creating
 # redirection URLs. In the context of virtual hosts, the ServerName
 # specifies what hostname must appear in the request's Host: header to
 # match this virtual host. For the default virtual host (this file) this
 # value is not decisive as it is used as a last resort host regardless.
 # However, you must set it for any further virtual host explicitly.
 #ServerName www.example.com

   ServerAdmin webmaster@primeprogrammer.com
   ServerName primeprogrammer.com
   ServerAlias www.ostechnix1.lan
   DocumentRoot /var/www/primeprogrammer.com

# Available loglevels: trace8, ..., trace1, debug, info, notice, warn,
 # error, crit, alert, emerg.
 # It is also possible to configure the loglevel for particular
 # modules, e.g.
 #LogLevel info ssl:warn

ErrorLog ${APACHE_LOG_DIR}/error.log
 CustomLog ${APACHE_LOG_DIR}/access.log combined

# For most configuration files from conf-available/, which are
 # enabled or disabled at a global level, it is possible to
 # include a line for only one particular virtual host. For example the
 # following line enables the CGI configuration for this host only
 # after it has been globally disabled with "a2disconf".
 #Include conf-available/serve-cgi-bin.conf
</VirtualHost>

Save & Close


Step 6:  Disable default virtual host

$ sudo a2dissite 000-default.conf

Step 7:  Enable your configured virtaul host

$ sudo a2ensite primeprogrammer.com.conf

Step 8: Test configured virtual host

$ sudo apache2ctl configtest

if all is ok shows below message

AH00558: apache2: Could not reliably determine the server's fully qualified domain name, using 127.0.1.1. Set the 'ServerName' directive globally to suppress this message
Syntax OK


Step 9: Configure defined site to hosts file

$ sudo vi /etc/hosts

[.....]
127.0.0.1     primeprogrammer.com
[.....] 


Step 10: Restart your apache2 server

$ sudo systemctl restart apache2

That's it.

Finally, open your installed browser and hit below url:

http://primeprogrammer.com

Other Service also provide

Let me know if you have any query.

Thanks
8795202855
Prime Programmer


Thursday, July 23, 2020

Prime Programmer

Prime Programmer: Prime Programmer offers an IT solutions to improve your business.We works with clients to develop the best possible IT solution for their company.

Monday, July 20, 2020

Steps To Integrate Bankonnect Co Payment Gateway (ICICI Bank) in Android(Mobile) App

Steps To Integrate Bankonnect Co Payment Gateway (ICICI Bank) in Android(Mobile) App


Steps To Integrate Bankonnect Co Payment Gateway (ICICI Bank) in Android(Mobile) App

Bank open is an new system to collect payment via android app. Following are the steps:


PG Sandbox APIs for Bankonnect PG.

Step 1:  After Signup, the merchant can go on Bankonnect.co and generate the Sandbox Keys from the tab - Integration - Payment Gateways


Step 2: Go to docs.bankopen.com and  For generating the Request Signature, please refer to the documentation, https://docs.bankopen.com/docs/authentication,  "Authentication" and follow the steps for "Authorization header" which will be required for creating Payment token and once completed  go to "Payment Gateway" click on "Layer" and then click on “Layer Checkout” for the integration.  The Authorization header would be 'bearer ACCESS_KEY:REQUEST SIGNATURE'.  


Step 3: Once you click on Layer Checkout - you can start integrating "Layer.js" to creating the payment token, please refer to the documentation, https://docs.bankopen.com/reference#generate-token. The sandbox API for generating the payment token is, https://sandbox-icp-api.bankopen.co/api/payment_token. You can also use POSTMAN for testing, the POSTMAN collection for payment token creation is, https://www.getpostman.com/collections/14fd333897d90c5ce3e1,  You don't have to use the UDF parameter when generating the request signature. 


Step 4: Once the integration is completed, the merchant can replace the live Key with Sandbox and replace the production URL instead of Sandbox URL. Refer to  For getting the sandbox API keys and credentials and Live API keys.


Step 5: Before using the live keys, the merchant has to click on “Activate Payment Gateway” from the Payment Gateway inside Integration section.

Android code

@Override
      public void onTransactionCompleted(final TransactionDetails transactionDetails) {
          runOnUiThread(new Runnable() {
              @Override
              public void run() {
                  String response = "On Transaction Completed:\n" +
                          "\n Payment Id: " + transactionDetails.paymentId +
                          "\n Payment Token Id: " + transactionDetails.paymentTokenId +
                          "\n Status: " + transactionDetails.status;

                  mTextViewResponseText.setText(response);
              }
          });
      }

      @Override
      public void onError(final String s) {
          runOnUiThread(new Runnable() {
              @Override
              public void run() {
                  mTextViewResponseText.setText(String.format("onError: \n%s", s));
              }
          });
      }

Remove Listener -

To remove listeners, you can invoke detachListener() after the transaction is completed or you haven’t to do with payment callbacks.

openPayment.detachListener()

conclusion:

Follow above steps to integrate in mobile app. If you are facing any issue please contact


For Integration kindly mail: mahendra@primeprogrammer.com

Also Provide

GST billing software

Stock Management software

Mobile application development

Payment Gateway Integration(core PHP, Laravel and Python)

Prime Programmer


    8795202855

Prime Programmer


Monday, July 6, 2020

Name validation check with alpha numeric using jQuery.

<div class="row">
        <div class="col-md-6 offset-md-3">
          <input type="textclass="form-control
placeholder="Full Namename="customer_name
id="customer_nameautocomplete="offrequired>
        </div>
      </div>


<script>
$('#customer_name').keypress(function(e) {
        var keyCode = e.keyCode || e.which;
        //Regex for Valid Characters i.e. 
Alphabets and Numbers.
        var regex = /^[A-Za-z0-9]+$/;

        //Validate TextBox value against the Regex.
var isValid = regex.test(String.fromCharCode(keyCode));
        if (!isValid) {
          return false;

        }

        return isValid;

      });

</script>

Price or Amount validation by jQuery is very easy


      <div class="row">
        <div class="col-md-6 offset-md-3">
          <input type="textclass="form-control"
  placeholder="Amount in INR
name="amountid="amount
autocomplete="offrequired ">
          
        </div>
      </div>

<script>

$('#amount').keypress(function(event) { if ((event.which != 46 ||
$(this).val().indexOf('.') != -1) &&
(event.which < 48 || event.which > 57)) { event.preventDefault(); } });

</script>


Number Validation with fixed count using jQuery


      <div class="row">
        <div class="col-md-6 offset-md-3">
          <input type="textclass="form-control"
 placeholder="Enter Contact No. Only
name="phoneid="phoneautocomplete="offrequired>
        </div>
      </div>


<script type="text/javascript">
      $("input[name=phone]").attr("maxlength", "10");
      $('#phone').keypress(function(e) {
        //if the letter is not digit then display
 error and don't type anything
        if (e.which != 8 && e.which != 0 && 
(e.which < 48 || e.which > 57)) {
          //display error message
          //$("#errmsg").html("Digits Only").show().
fadeOut("slow");
          return false;
        }

      });
</script>


Code run perfectly.

Any issue contact me

New Payment Gateway Of ICICI Bank Released(Bankonnect.co)


New Payment Gateway Of ICICI Bank Released(Bankonnect.co)

 
I have integrated new ICICI bank connect payment gateway for our client. It is too easy. integrate.

It's layer js is so interesting. 

PG Sandbox APIs for Bankonnect PG.

Following are the procedure


Step 1:  After Signup, the merchant can go on Bankonnect.co and generate the Sandbox Keys from the tab - Integration - Payment Gateways

Step 2: Go to docs.bankopen.com and  For generating the Request Signature, please refer to the documentation, https://docs.bankopen.com/docs/authentication,  "Authentication" and follow the steps for "Authorization header" which will be required for creating Payment token and once completed  go to "Payment Gateway" click on "Layer" and then click on “Layer Checkout” for the integration.  The Authorization header would be 'bearer ACCESS_KEY:REQUEST SIGNATURE'.  

Step 3: Once you click on Layer Checkout - you can start integrating "Layer.js" to creating the payment token, please refer to the documentation, https://docs.bankopen.com/reference#generate-token


The sandbox API for generating the payment token is, https://sandbox-icp-api.bankopen.co/api/payment_token. You can also use POSTMAN for testing, the POSTMAN collection for payment token creation is, https://www.getpostman.com/collections/14fd333897d90c5ce3e1,  You don't have to use the UDF parameter when generating the request signature. 

Step 4: Once the integration is completed, the merchant can replace the live Key with Sandbox and replace the production URL instead of Sandbox URL. Refer to  For getting the sandbox API keys and credentials and Live API keys.

Step 5: Before using the live keys, the merchant has to click on “Activate Payment Gateway” from the Payment Gateway inside Integration section.
Once MID is acquired and live, the user would be able to see the status under Integration - Payment Gateway as "Payment Gateway - Active"
For getting the sandbox API keys and credentials and Live API keys.

1. Please login to open dashboard click on Integration tab -next to client name go to settings- company profile - developer API 

2. In that Api key and access key you will get by clicking on generate it tab.

3. Also ensure whebook url which will be your source and redirection url on which you will get txn confirm message both update it and generate API key and Access key .


Call or what's app for Integration


Also Provide

GST billing software

Stock Management software

Mobile application development

Payment Gateway Integration(core PHP, Laravel and Python)


Prime Programmer

    8795202855

Prime Programmer


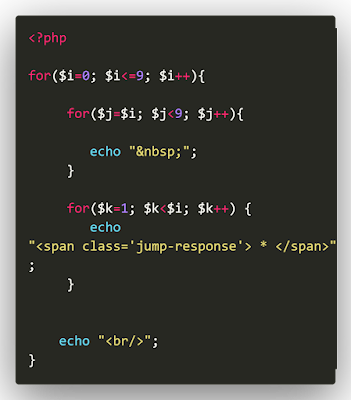
colourful pyramid using PHP

  <! DOCTYPE html > < html lang = "en" > < head >   < title >Colorfull Pyramid</ title >   < me...

Clock